
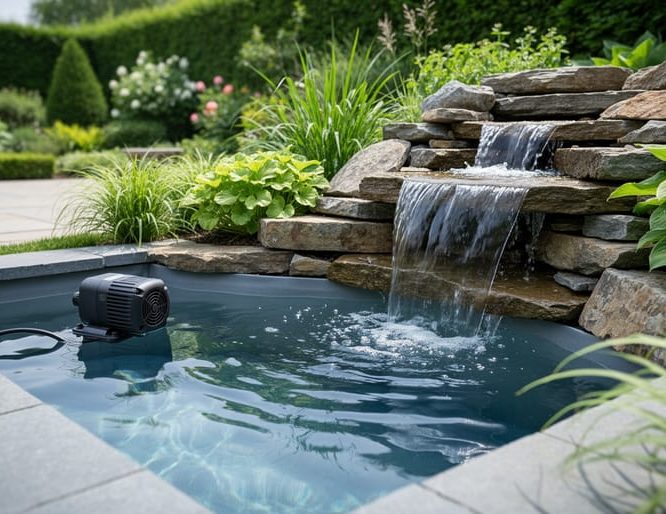
Building a water feature in your backyard takes between one weekend and several weeks, depending on whether you’re installing a simple container fountain or a full pond ecosystem with waterfalls and filtration. The core process involves excavating and leveling your site, installing a quality liner or preformed shell, setting up a pump and plumbing, arranging rocks and edging, and filling the feature with water. Most homeowners can tackle a basic water feature with standard tools and careful planning, though larger projects benefit from professional guidance on electrical work and water circulation.
The appeal is obvious: water transforms any outdoor space into a tranquil retreat. The gentle sound of moving water masks neighborhood noise, attracts birds and beneficial wildlife, and creates a focal point that draws people outside. We’ve seen homeowners fall in love with their yards all over again once they add that soothing element.
But here’s what separates successful projects from expensive mistakes: understanding the relationship between your feature’s size, its pump capacity, and your yard’s drainage. Too many DIY attempts fail because the pump is undersized, the liner develops leaks from poor preparation, or the feature floods the patio after the first heavy rain. Get these fundamentals right from the start, and you’ll enjoy years of low-maintenance beauty.
This guide walks you through the complete process, from selecting the right location and materials to testing your finished feature. You’ll learn which steps demand precision, which allow creativity, and when it makes sense to transform your pond with expert help. Whether you’re ready to break ground tomorrow or still weighing your options, you’ll finish with the knowledge to make confident decisions.
Planning Your Water Feature Project
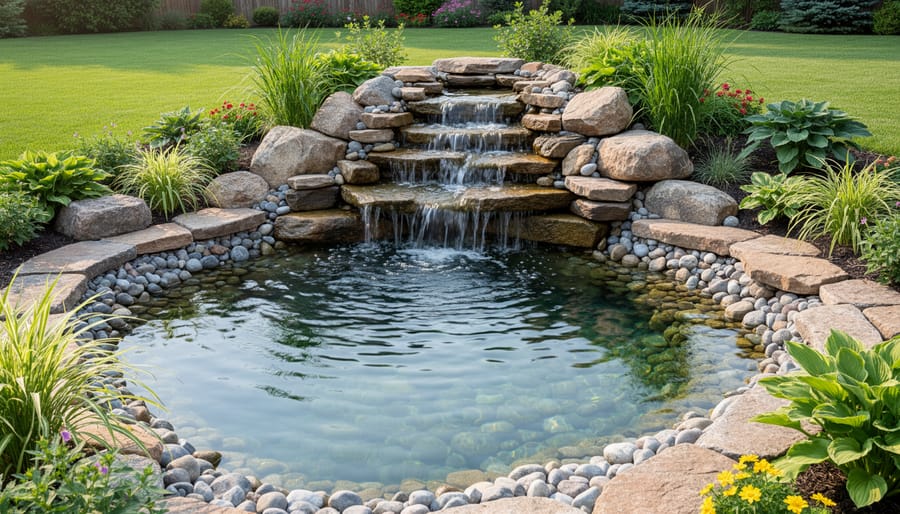
The best water features start not with a shovel, but with thoughtful observation of your yard and honest assessment of your goals. Spending a few days watching how sunlight moves across potential locations, where water naturally collects after rain, and which spots you actually spend time enjoying will save you from costly mistakes later.
Choosing the Right Location
Your water feature’s success depends heavily on where you place it. Walk your property at different times of day, imagining where you’ll hear the water’s sound from inside your home and where you’ll naturally gather outside. Avoid low spots that already puddle, these areas have poor drainage and will create maintenance headaches. Instead, look for slightly elevated ground with good natural drainage.
Several practical factors determine the best spot:
- Sunlight exposure: Four to six hours of sun supports plants; full shade limits algae but also plant options
- Tree proximity: Roots complicate excavation, and falling leaves mean constant maintenance
- Electrical access: Running power more than 50 feet gets expensive and complicated
- Natural drainage patterns: Build where water flows away from, not toward, your foundation
- Viewing angles: Position your feature where you’ll actually see and hear it from your deck, patio, or favorite windows
Also consider access for maintenance, you’ll need to reach the pump, clean the filter, and trim plants. A beautiful feature tucked in a hard-to-reach corner becomes a burden fast.
Deciding on Size and Style
Match your feature’s scale to your actual yard size and maintenance commitment. A small pondless waterfall (where water disappears into an underground reservoir) offers big visual impact with minimal upkeep, perfect for busy homeowners or families with young children. Traditional ponds create habitat for fish and plants but demand more attention.
For most backyard settings, starting with 100 to 200 square feet gives you enough space for interest without overwhelming maintenance. You can always expand later once you understand what living with a water feature involves.
Setting a Realistic Budget and Timeline
Quality materials matter more than size. Budget $2,000 to $5,000 for a modest DIY feature with proper components, or $5,000 to $15,000 for professional installation of a fully functioning pond ecosystem. Don’t cheap out on liners, pumps, or filtration, these determine whether your feature lasts two years or twenty.
Plan for two to four weekends of work if you’re doing it yourself, accounting for weather delays and the inevitable “oops, we need one more trip to the supplier” moments.
What You’ll Need: Tools and Materials
Gathering your supplies before you start makes the whole project run smoother. The exact list depends on whether you’re building a simple pond, a cascading waterfall, or a pondless water feature, but most projects share common essentials.
Basic Tools You’ll Need
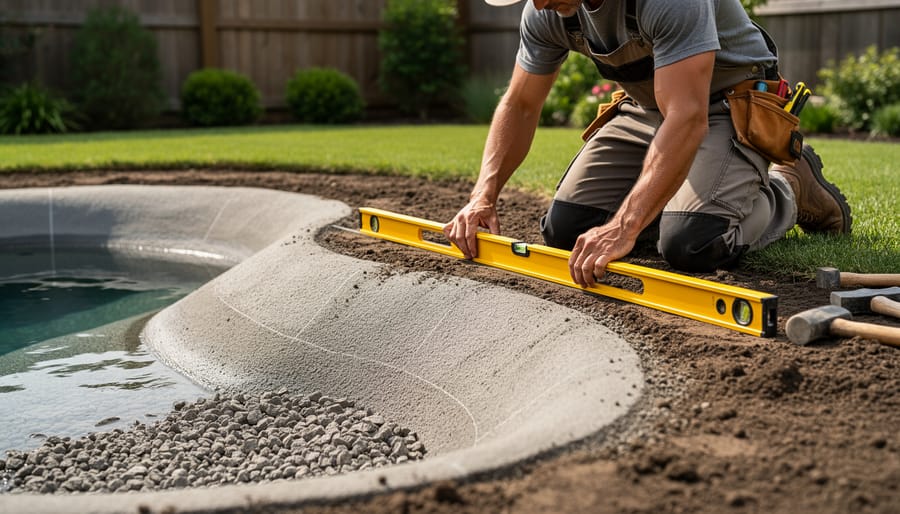
Start with a sturdy shovel or spade for digging, you’ll be moving more earth than you expect, so a comfortable grip matters. A level helps ensure your pond edges sit even and waterfalls flow where you want them. You’ll want a sharp utility knife for trimming liner and a tape measure for checking dimensions as you go. If you’re working with flexible liner, scissors designed for heavy-duty cutting make clean edges without tearing. A wheelbarrow saves your back when hauling rocks and soil.
The Foundation Materials
Flexible EPDM liner is the backbone of most water features. This rubber material comes in various thicknesses, 45 mil works for most backyard projects, but step up to 60 mil if you’re positioning heavy boulders that could puncture thinner material. Preformed rigid shells offer another option for smaller ponds, though they limit your shape choices.
Before the liner goes down, you need underlayment fabric to protect it from rocks and roots poking through from below. This cushioning layer prevents tiny punctures that turn into big headaches later. Don’t skip it or substitute old carpet, proper underlayment designed for pond construction handles moisture without breaking down.
Moving and Filtering Water
Your pump creates the magic of flowing water. Size it according to your feature’s volume and how high water needs to travel, a pump rated for 2,000 gallons per hour handles most medium-sized backyard ponds with a modest waterfall. You’ll need flexible tubing to carry water from pump to spillway, plus clamps to secure connections.
Filtration keeps your water clear and healthy. Mechanical filters catch debris while biological filters house beneficial bacteria that process fish waste and organic matter. Skimping on filtration means constant maintenance battles.
The Finishing Touches
Rocks and gravel transform construction into nature. Larger foundation stones (50 to 200 pounds) anchor your design and create waterfall edges. Medium river rocks fill gaps and hide liner. Smooth gravel lines the bottom and looks natural underwater. Buying locally often costs less than imported stone and matches your region’s aesthetic.
Quality materials cost more upfront but last decades instead of needing replacement in five years. A cheap pump fails when you’re away on vacation. Thin liner tears during the first freeze. Invest in the right gear now, and you’ll enjoy your water feature instead of constantly repairing it.
Safety First: What to Watch For
Before you grab a shovel, take a moment to address the safety essentials that protect you, your family, and your property during construction. Overlooking these precautions can turn an exciting project into a costly or dangerous situation.
Your first call should be to call 811 before digging to locate underground utilities. Gas lines, electrical cables, water pipes, and telecommunications conduits often run beneath yards in unmarked locations. Professional locators will mark these hazards for free, typically within a few business days. Hitting a utility line can cause serious injury, expensive repairs, and service disruptions for your entire neighborhood.
Water and electricity create lethal combinations. All pumps, filters, and lighting must connect to ground fault circuit interrupter outlets that shut off power instantly if they detect moisture. Extension cords through windows or standard indoor outlets aren’t safe substitutes. Your electrician should run dedicated weatherproof circuits to locations near your feature.
Excavation means heavy lifting. Pond liners, large rocks, and bags of gravel add up quickly. Lift with your legs, not your back, and recruit helpers for anything over 50 pounds. Take frequent breaks to avoid fatigue that leads to mistakes or injury.
If your design includes deep water or you have young children or pets, plan shallow zones, gradual slopes, and secure fencing. You might need to fix water feature design elements before construction if safety concerns emerge during planning.
Finally, know your limits. Complex grading, heavy equipment operation, or projects near structures benefit from professional expertise. There’s no shame in hiring experienced help for portions that exceed your skill level.
Step-by-Step: Building Your Water Feature
Step 1: Mark and Excavate
Start by laying out a garden hose or spraying landscape paint to mark your water feature’s outline. Walk around it from different angles, you’ll likely adjust the shape two or three times before it feels right. Once you’re satisfied, use a flat spade to cut through the sod along your marked line, then peel away the turf in sections.
Dig the deepest zone first, typically 18-24 inches for a small pond. Work outward, creating graduated shelves about 12 inches wide at different depths. These shelves hold plant pots and give wildlife escape routes. Keep the soil you remove nearby if it’s decent quality, you’ll use it later to build up berms around waterfalls or disguise edges.
Check depth frequently with a measuring tape, not your eye. The hole always looks deeper than it actually is. For features with waterfalls or streams, remember water flows downhill, so create a gentle slope from the spillway location back toward your pump placement at the pond’s deepest point. Remove any rocks, roots, or sharp debris from the hole’s bottom and sides as you go.
Step 2: Install Underlayment and Liner
Before you place anything in that hole, inspect every inch of exposed soil. Walk through and remove rocks, roots, sticks, and anything else that could puncture your liner down the road. Even a small pebble becomes a problem when thousands of pounds of water press down on it. Run your hands over the surfaces, especially the shelves and slopes, to catch what your eyes might miss.
Once the excavation is clean, roll out your underlayment fabric. This protective layer cushions the liner from ground movement and sharp objects that work their way up over time. Drape it loosely to follow the contours of your dig, overlapping pieces by at least six inches if you need multiple sections. Don’t pull it tight or it defeats the cushioning purpose.
Now comes the liner itself. Unfold it in the sun for fifteen minutes to make it more pliable and easier to work with. Center it over the excavation with equal material extending past all edges. As you press it down into the hole, create deliberate folds at corners rather than forcing the material flat, which causes stress points and eventual tears. Smooth out major wrinkles by hand, but small creases are normal and disappear once water fills the feature. Leave at least twelve inches of excess liner extending beyond your finished edge all around.
Step 3: Set Up the Pump and Filtration System
The pump is the heart of your water feature, and where you put it matters more than you might think. For most backyard ponds, place the pump at the deepest point, this keeps debris from collecting and ensures the pump draws from cooler water. If you’re building a waterfall or stream, you’ll need to run flexible tubing from the pump up to your waterfall’s starting point. Measure twice before cutting tubing; it’s easier to trim excess than to splice short sections together.
Your filtration system keeps the water clear and healthy. Mechanical filters catch debris like leaves and fish waste, while biological filters house beneficial bacteria that break down harmful ammonia. Some setups combine both in one unit, which simplifies things for beginners. Position your skimmer (if using one) opposite the waterfall so water circulates across the entire pond rather than taking shortcuts.
Now for the electrical work, this is where you don’t cut corners. Run a dedicated outdoor-rated extension cord or have an electrician install proper outdoor wiring. Your pump must plug into a GFCI outlet, which shuts off power instantly if water contacts electricity. Never use indoor extension cords or bypass safety features. If you’re uncomfortable with electrical work near water, call a licensed electrician. It’s worth the investment for peace of mind.
Step 4: Position Rocks and Create the Natural Look
Start with your largest, flattest rocks as the foundation, these anchor the entire look and support everything that comes after. Place them around the pond perimeter first, choosing pieces with interesting textures and natural weathering that make your feature look like it’s always been there. Position these foundation stones to cover and hold down the liner edge, leaving about six inches of liner extending underneath for a secure seal.
For waterfall spillways, select rocks with flat tops that create clean water flow. Stack spillway stones so they tilt slightly forward, this keeps water flowing over the edge instead of sneaking underneath. Test each placement by running water over it before securing; you’ll see immediately if the flow splits oddly or drips behind the stone. Adjust until you get that smooth sheet of water or the gentle cascade you’re after.
Tuck all visible liner edges under rocks as you work around the feature. The liner should disappear completely, no black plastic peeking through ruins the natural illusion. Fill gaps between larger rocks with fist-sized stones, then smaller gravel to create a seamless transition. Think about how rocks settle in nature: clustered in some areas, scattered in others, never in perfect symmetry. Step back frequently to assess your work from the viewing angles that matter most in your yard.
Step 5: Fill, Test, and Adjust
With your water feature taking shape, it’s time to bring it to life. This phase reveals whether your construction holds up and lets you fine-tune everything before calling the project complete.
Start by filling slowly with a garden hose, beginning at the deepest point. As water rises, watch the liner closely, if sections pull or wrinkle, pause and reposition them before they’re weighted down. Check around the perimeter for any settling or shifting rocks that need adjustment while you can still reach them easily.
Once you’ve got a few inches of water in place, follow this testing sequence:
- Fill slowly and pause every few inches to inspect for leaks around the liner edges and plumbing connections
- Check the surrounding ground for wet spots that signal liner punctures or poor edge placement
- Turn on the pump at its lowest setting first, then gradually increase to test flow at various speeds
- Adjust rock positions where water spills over, shift stones forward or back to control how water cascades and sounds
- Treat the full volume with dechlorinator appropriate for your water source to make it safe for future plants and fish
Pay attention to the waterfall’s sound and appearance. If it’s too loud or splashy, reposition the spillway rocks to create a smoother flow. If certain areas look dry or bypass the main channel, add smaller stones to guide water where you want it. Let the pump run for several hours while you observe, sometimes issues only show up after things settle. This is your chance to get everything just right before the ecosystem starts establishing itself.
How to Know Your Water Feature Is Working Right
After you’ve filled your water feature and fired up the pump, give yourself a week to watch how everything settles in. The first few days tell you whether your construction is solid or needs adjustments before problems become permanent.
Start by checking the water level daily. It should drop slightly from evaporation, especially in summer, but if you’re adding more than an inch every day, you’ve got a leak. Walk the perimeter and look for wet spots or muddy areas around the liner edges, these reveal where water’s escaping. The ground around your feature should stay dry.
Watch the water move. You want visible circulation throughout the entire feature, not just near the pump. Dead zones where water sits stagnant will turn green fast. Your waterfall should create a pleasant, consistent sound, not a trickle that suggests weak flow or a roar that means the pump’s working too hard.
Check your rocks after three days. They shouldn’t shift or wobble when you gently press them. Loose rocks can damage the liner or create hazardous edges. If stones have settled unevenly, reposition them now before adding fish.
Cloudy water in the first week is normal as sediment settles and beneficial bacteria begin colonizing surfaces. By day ten, you should see improvement. Milky-green water that persists beyond two weeks usually means the pump isn’t strong enough for your feature’s volume or your filtration needs an upgrade.
If you plan to add fish later, these verification steps become even more critical, proper pond fish care and Japanese koi care depend on getting the basics right from the start. Weak flow or persistent leaks stress fish and make maintenance frustrating.
Your Next Steps After Construction
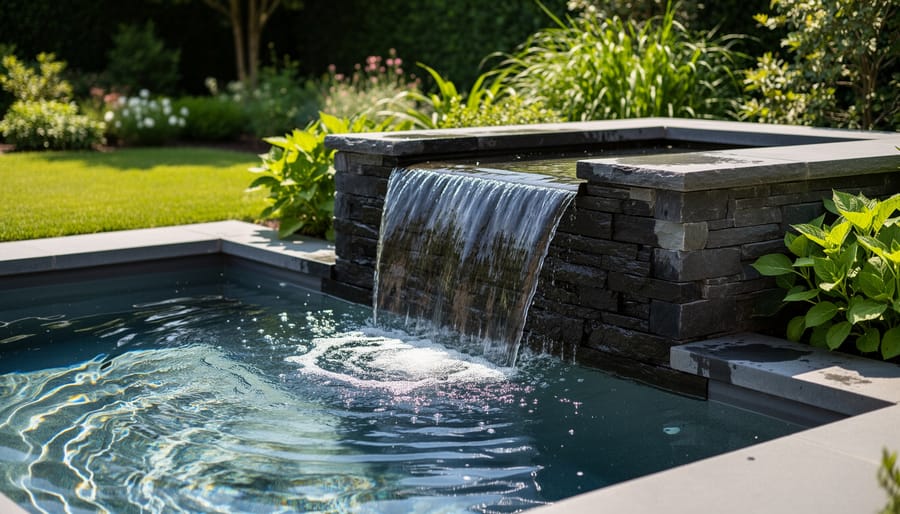
Your new water feature is built, filled, and running, congratulations on reaching this milestone. Now comes an equally important phase: giving your water feature time to mature into a thriving, balanced ecosystem. The first few weeks require patience and attention, but the effort establishes a foundation for years of low-maintenance beauty.
Think of your new water feature as a living system that needs time to find its rhythm. During the first month, focus on these essential tasks:
- Monitor water levels daily and top off as needed to account for evaporation and settling
- Add beneficial bacteria weekly to jumpstart biological filtration
- Introduce hardy marginal plants after one week to begin natural filtration
- Wait 3-4 weeks before adding any fish to allow water chemistry to stabilize
- Begin a gentle maintenance routine of checking pump flow and removing debris
The water will likely look cloudy or even slightly green during the first two weeks, this is completely normal. You’re not witnessing failure; you’re watching an ecosystem form. Beneficial bacteria colonies need time to establish on rocks, gravel, and filter media. These microscopic workers break down organic waste and create the biological balance that keeps water clear naturally.
When you do add fish, start small. Introduce just a few hardy varieties and watch how they adapt before adding more. Consider seeking expert pond care guidance if you’re unsure about species selection or feeding schedules, getting this right from the start prevents problems later.
As seasons change, your water feature will need adjustments. Pump settings may shift between spring’s gentle flow and summer’s full circulation. Plants will grow and require trimming. Before winter arrives, you’ll need to decide whether to keep the feature running or winterize it based on your climate.
The ecosystem truly matures over the first full year. Each season teaches you something new about your water feature’s personality, and patience during these early months pays dividends in long-term health and beauty.
Common Questions About Building Water Features
Building a water feature raises plenty of practical questions, and getting clear answers upfront helps you plan with confidence. Here’s what homeowners ask us most often when they’re ready to transform their backyard.
Do I need a permit to build a water feature?
Requirements vary by municipality, some areas require permits for ponds over a certain depth or size, while others have no restrictions for residential water features. Check with your local building department before you start digging to avoid costly surprises.
How long does it take to build a backyard water feature?
A simple pondless waterfall might take a weekend, while a full ecosystem pond with plants and filtration typically requires three to five days of solid work for a DIY project. Weather, soil conditions, and project complexity all affect the timeline.
Should I tackle this myself or hire professionals?
Basic features like small container ponds work well as DIY projects, but larger installations with complex plumbing, electrical work, or heavy rockwork benefit from professional expertise. If you’re uncertain about digging depth, pump sizing, or creating proper water flow, professional guidance saves money in the long run by avoiding costly mistakes.
What kind of ongoing maintenance should I expect?
Plan on weekly checks of water levels and pump function, monthly filter cleaning during active season, and seasonal tasks like netting falling leaves and preparing for winter. Most established features need about 30 minutes of attention per week once the ecosystem balances.
How much does a typical water feature project cost?
DIY materials for a basic 6×8 pond start around $800 to $1,200, while professionally installed ecosystem ponds range from $3,000 to $15,000 depending on size, materials, and features like lighting or elaborate waterfalls. Quality components cost more initially but reduce long-term headaches.
Can I add fish right away after construction?
Wait at least two to three weeks after filling your pond to allow beneficial bacteria to establish and water chemistry to stabilize. Start with hardy fish like goldfish, introduce them gradually, and avoid overstocking in the first season.
These questions come up because water features involve real investment of time, effort, and money. The good news is that thousands of homeowners have successfully navigated these decisions and now enjoy the peaceful sound of flowing water in their own backyards. Whether you choose to build it yourself or work with experienced professionals, understanding these fundamentals helps you make choices that fit your situation.
Every yard presents unique challenges and opportunities. What works perfectly in one location might need adjustment in another, and that’s completely normal. The learning curve isn’t steep, but there’s genuine value in asking questions before you commit to a specific approach or design.
Building your own water feature takes work, no question about it. There’s digging, heavy lifting, problem-solving on the fly when the liner won’t cooperate or the waterfall doesn’t sound quite right. But here’s what makes it worthwhile: the first morning you step outside with your coffee and hear that gentle trickle, or the evening you watch dragonflies skim across the surface. Those moments pay back every shovelful of dirt.
Whether you tackle the project yourself or bring in experienced hands, you’re creating something that transforms your backyard into a retreat. The sight and sound of moving water changes how you experience your outdoor space, it becomes the spot where you naturally gravitate to unwind, where guests linger during gatherings, where wildlife visits.
If you’ve read through these steps and feel ready to dig in, that’s fantastic. If you’re thinking “I love the vision but would rather have professionals handle the execution,” we get that too. The Skippy’s Stuff team has built countless water features across the region, and we genuinely enjoy bringing these projects to life. Either way, you’re on the path to adding something beautiful and calming to your home.